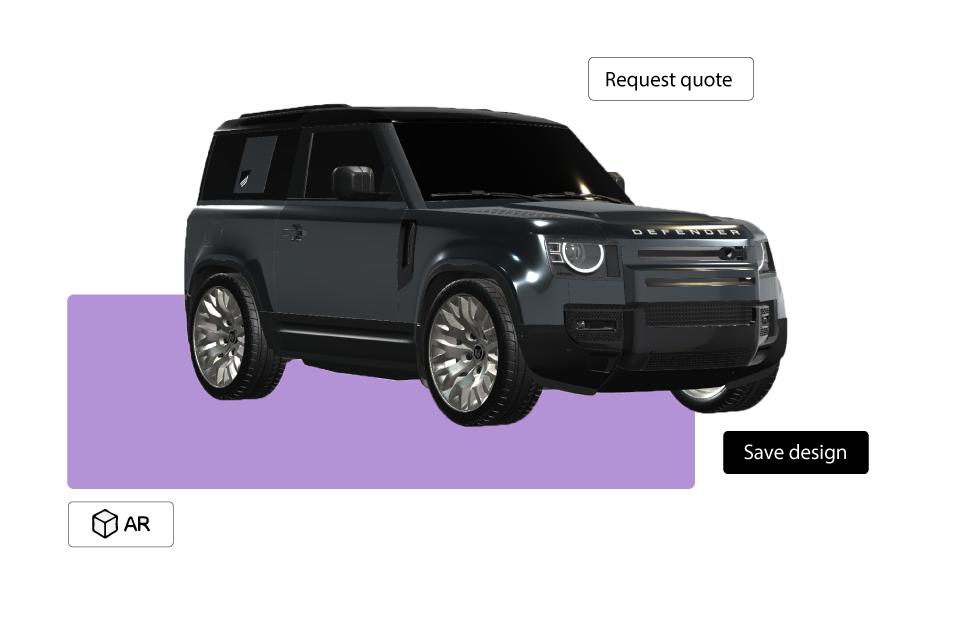
Help customers understand product options faster by letting them configure and visualize products in real time on your Shopify product pages. Add the Shopify product configurator plugin and CPQ software for a higher conversion rate.
Shopify product configurator & CPQ
±15 minutes. No commitment. Just answers about your Shopify store. ±15 minutes. No commitment.
✓ Build for Shopify stores
✓ No redirects or external configurator
✓ Works directly on your product pages

+30%
Higher Conversion Rates
+40%
Higher Average Order Value
50%
Faster Sales Process
100%
Fewer Order Errors
Key Benefits
Shopify CPQ & Product Configurator plugin

Enhanced product visualization
Our Shopify plugin brings the power of 3D configuration and visualization to your online store. Customers can interactively view and customize products in a dynamic 3D environment, allowing them to see every angle and detail. This level of engagement and realism boosts customer confidence and drives conversions.

Configure and customize
Our CPQ system integrated with Shopify empowers customers to personalize products according to their unique preferences. From choosing colors and materials to selecting features and options, customers can create their own customized versions of your products. This level of personalization enhances the customer experience and fosters a deeper connection with your brand.

Plugin integration
We understand the importance of a seamless integration process. Our Shopify plugin is designed to seamlessly integrate with your existing Shopify store, ensuring a hassle-free implementation. You don’t have to worry about disrupting your operations or starting from scratch. Simply install the plugin, and you’re ready to take advantage of its powerful features.

Easy sales process
Our plugin streamlines your sales process by automating quote generation, order management, and inventory tracking. With our CPQ system integrated into Shopify, you can quickly generate accurate quotes based on customer preferences and streamline the entire order fulfillment process. This results in reduced manual effort, fewer errors, and faster order processing.

Improved conversion rates
By offering an immersive and personalized shopping experience, our Shopify plugin helps increase conversion rates. Customers are more likely to make a purchase when they can visualize and customize products according to their preferences. The interactive 3D visualization and easy-to-use configuration options create a compelling shopping experience that drives higher conversion rates and boosts your revenue.

Mobile-friendly design
Our Shopify plugin is optimized for mobile devices, ensuring that customers can access the full power of our CPQ system and 3D configurator on their smartphones and tablets. This enables you to reach and engage customers wherever they are, providing a seamless shopping experience across all devices.
Free ±15 minute walkthrough tailored to your product catalog.
Trusted by Shopify stores worldwide


Shopify product configurator & CPQ software supported features
- Augmented reality
- Presets for multiple configuration entry points
- Complex pricing engine
- PDF quote generation
- Save & Share design
- Print ready output
- Custom configurator styling
- Multi Language and currency
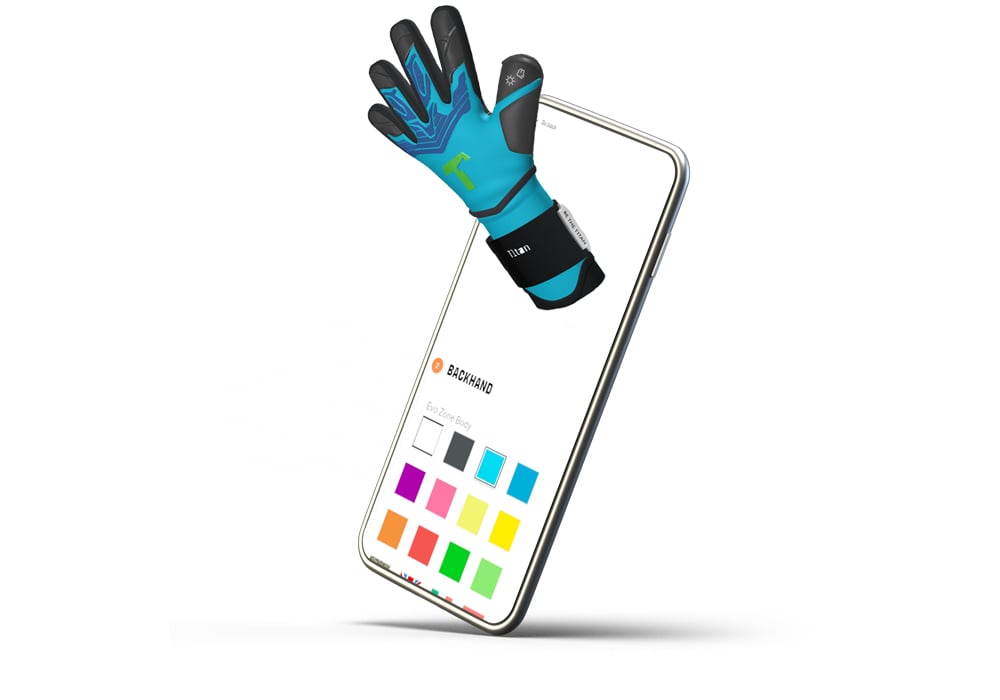
T1tan: customize sporting goods with Expivi on Shopify
When your sports equipment not only performs well but also looks impressive, there’s nothing quite like it. Goalkeepers at the professional level worldwide strive to make a statement, and if their gloves help them achieve that, even better. T1tan understands this perfectly. Their research and development team has designed top-tier goalkeeping gloves that offer remarkable grip, safety, and comfort.
To enhance the customer experience and make the purchasing journey more enjoyable, T1tan utilized Expivi’s platform to create a Shopify product configurator. The outcome has been outstanding, with 360-degree views that provide customers with a comprehensive look and add an element of fun. This Shopify product customizer enables users to explore various combinations, allowing them to create a truly unique product. It’s an excellent way to customize Shopify and cater to individual preferences.
Want to know more?
Schedule a 15 minute discovery call with our team to talk about your challenge or ambition, and find out how we can help you grow.